How to Submit Your Object to the Museum of Everyday Objects (MoEO)
Step 1 Take a Clear Photo of Your Object:
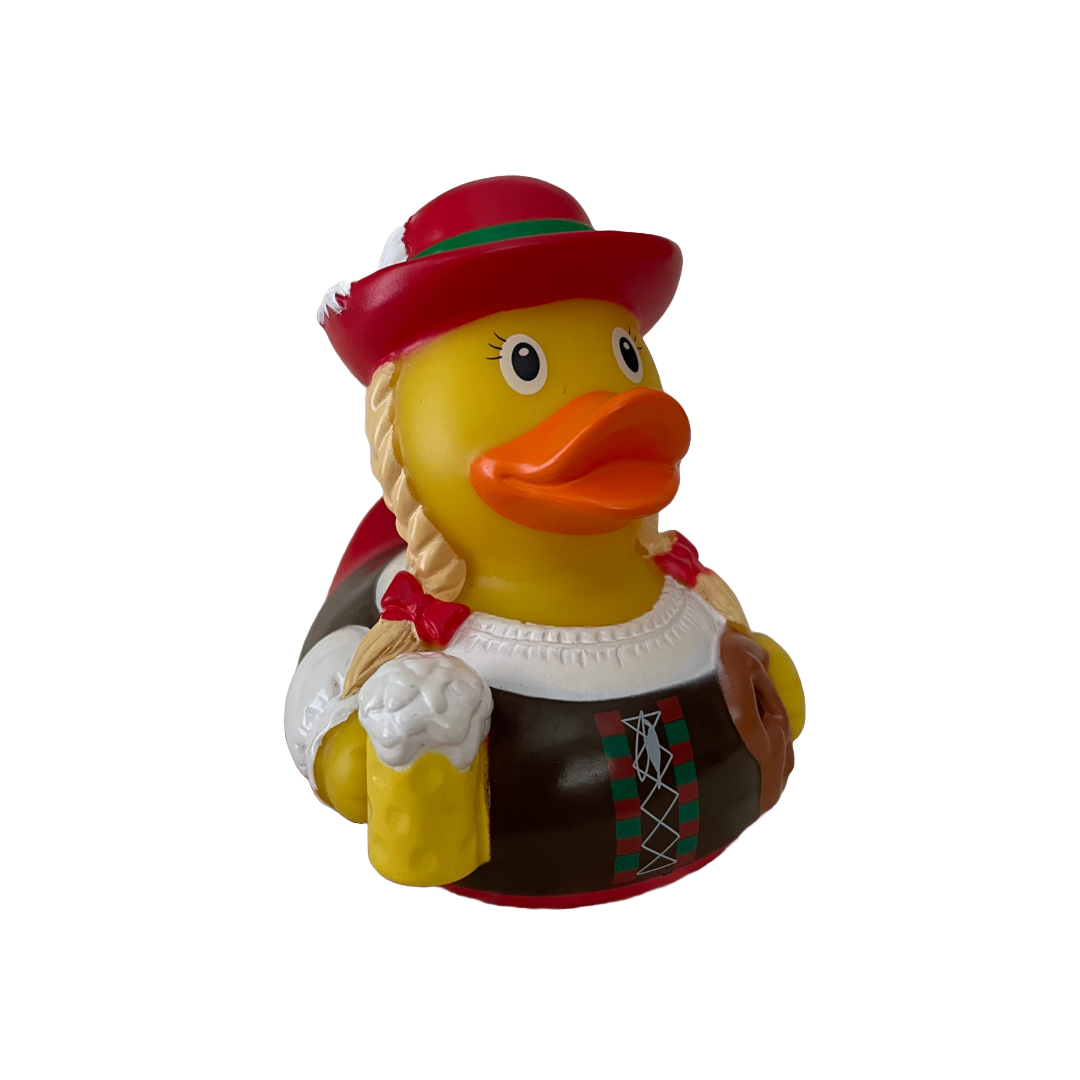
Use a Plain Background: Place your object on a solid, plain surface (like a pillowcase) for easier background removal. Ensure proper lighting: Use natural or diffused light to avoid harsh shadows. Make sure your object is well-lit and in focus. Example: A rubber ducky photographed on a white pillowcase.
Use a Plain Background: Place your object on a solid, plain surface (like a pillowcase) for easier background removal. Ensure proper lighting: Use natural or diffused light to avoid harsh shadows. Make sure your object is well-lit and in focus. Example: A rubber ducky photographed on a white pillowcase.
Step 2 Remove the Background:
Use a background removal tool or app: Adobe Photoshop’s “Remove Background” feature, Canva, Remove.bg, Adobe Express Ensures the final image only shows the object without background or shadows.
Use a background removal tool or app: Adobe Photoshop’s “Remove Background” feature, Canva, Remove.bg, Adobe Express Ensures the final image only shows the object without background or shadows.

Step 3 Apply a White Background:
Open the image using a tool like Canva, Photoshop, or Adobe Express to add a white background. Center the object and ensure there’s enough white space around it for a clean presentation
Open the image using a tool like Canva, Photoshop, or Adobe Express to add a white background. Center the object and ensure there’s enough white space around it for a clean presentation

Step 4 Prepare Your Donation Form:
Select the Type of Object; Choose the category that best fits your item (e.g., "Momento"). Give Your Object a Title: Write a short, descriptive name (e.g., "Duck from Germany"). Add Your Name or Pen Name: Enter the name you want to appear with your donation (e.g., “Bunny”). Write the Object’s Backstory: Share a short explanation of your object’s significance.
Example: “This is a duck I got when I went to Germany this summer! She brings a smile to my face and makes my day a little brighter.”
Optional: Add More Images: You can upload up to 5 photos of your object from different angles. Repeat Steps 1–3 for each image.
Step 5 Save and Upload Your Image:
Save the edited image as a PNG or JPG file. Ensure the file size is no larger than 1MB. Rename the file to match your object’s title and donor name (e.g., "Duck_from_Germany_Bunny.png").
Step 6 Complete the Form and Submit it:
Upload the final image to the donation form. If applicable, check the box for 3D object conversion (and review the separate tutorial on how to set up your images for this option). Then, submit the form.
Step 7 Wait for Review:
The MoEO team will review your submission. Once approved, your object will appear in the appropriate exhibit.
(e.g., the "Momentos" page). You’ll see all the details you submitted included on the page.
Thank you for donating to the Museum of Everyday Objects! Your contribution helps us celebrate the stories behind cherished items. 🎉
How to Submit Images for 3D Rendering of Your Object
Step 1 Take Multiple Photos of Your Object:
- Follow the same steps as the first tutorial to ensure proper background removal and image preparation.
- Angles to Capture:
- Take at least ten photos from various angles (think of a compass):
- North
- Northeast
- East
- Southeast
- South
- Southwest
- West
- Northwest
- Top
- Bottom
Image Examples:
Note: If you want extra angles, like south-southwest, feel free to include those as well for even more thorough coverage.


Step 2: Edit the Images:
- Remove the Background:
- Use tools like Adobe Express to remove the background, ensuring a clean and white background around the object.
- Ensure Proper Image Size:
- Adjust each image to be around 1080 px by 1080 px to keep file size under 1MB.
- Add Ample White Space:
- Make sure there’s enough white space around your object for a clean presentation.
Step 3: Name Your Images:
- Each image should have a proper title that accurately reflects your donation (e.g., "Duck_from_Germany_Angle_North.png").
Step 4: Compress Your Images:
- Once all your images are edited, download them and compress them into a zip file.
- Ensure the zip file is properly named to reflect your donation (e.g., "Duck_from_Germany_3D_Rendering.zip").
Step 5: Submit Your Images:
- Upload the Zip File:
- Attach the compressed zip file with all your images to the donation form.
- Check the Box for 3D Rendering:
- Select the checkbox that indicates you’d like us to create a 3D rendering of your object.
Step 6: Submit the Form
- Submit the completed donation form. Your images will be reviewed and used to create a 3D rendering of your object.
Thank You for Your Donation!
We sincerely appreciate your support in donating to the Museum of Everyday Objects. Your contribution helps us create a more interactive and engaging experience for all.